Creating Model Railroad Roadbed
for an O Gauge Model Railroad Layout
Designed for a Spare Bedroom
Once the benchwork is complete for our O Gauge Spare Bedroom Model Railroad Layout, it’s time to lay some track. But just as a prototype railroad needs a sturdy roadbed to keep the track in place while heavy trains run over it, so does your model railroad.
If you look at the prototype railroads near where you live, you will notice they are usually slightly elevated from the surrounding terrain. This elevation, in addition to creating the solid footing the heavy trains require, provides natural drainage for water that could soften the roadbed if allowed to pool, and allows track to compensate for vagaries in the level of the natural terrain.
This elevated area on which the railroad track rests is created in two phases: a sub-roadbed of rock, gravel, or tamped earth, topped with a gravel roadbed into which the track is set. We will recreate this with our model railroad roadbed for much the same reasons: our 5/8” plywood sub-roadbed creates a solid base to support the track, and the styrene foam board roadbed provides a surface to attach the track to hold it in place as our trains cross it.
Our choice of roadbed material also serves an important secondary purpose: noise suppression. If you’ve ever attached O Gauge model railroad track directly to plywood, you know the tremendous racket a passing train creates. The wheels of the train create a vibration in the tubular rails, which is transmitted to the plywood, which acts like the wood in an acoustic guitar, retransmitting and amplifying it. Styrene insulating foam sheets (Styrofoam is the brand name of the Dow Chemical Company’s version of these) acts as a good damper to these vibrations, quieting the sound of your trains to a more tolerable level.
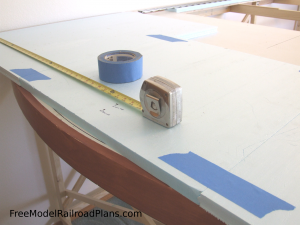
Since the left end of our benchwork was made from an existing table that already has a 5/8” plywood top, we started there. In Figure 21 we laid the tongue-and-groove sheets of 1” foam for the roadbed of our mainline loop on the table top and measured from the wall to find the center point of our 72” curve, and the minimum distance from the edge of the table – usually you want to leave enough room from the track to the edge of the table so that a derailed train doesn’t go plummeting to floor. From these measurements you can find the center of the circle.
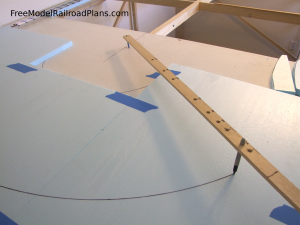
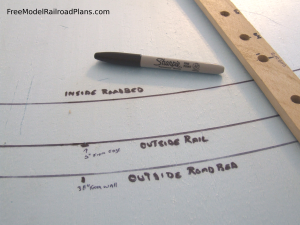
Once you’ve found the center of the circle, you can use a homemade trammel (beam compass) to draw the track center-line and the inner and outer edges of the roadbed, as shown in Figure 22. This tool works just like the circle-drawing compass you used in drafting class, with a pivot point at one end and a drawing point at the other. We used a nail at one end for the pivot point and drilled holes just big enough for a Sharpie marker to fit at each of the points we needed to mark for a 72”, a 54”, and a 42” circle, the three diameters of track we will be using for our layout. Make sure to leave enough room for beveling the inner and outer edges of the roadbed later to match the angle of prototype railroad roadbed. However, when measuring to drill these holes, don’t make the same mistake we did, and measure from the end of your beam compass. Be sure to measure from the pivot point hole. We originally planned our center hole to line up with the outside rail of our curves, as shown in labeling in figure 22a, but when we laid track on it after drawing the arc, we realized the line was actually where the center rail lay. That’s when we went back and measured, and realized we had used the edge of the trammel, rather than the pivot point for the base of our distances. Luckily for us the distance between the edge of the trammel and the pivot point was equal to the distance between the center rail and outer rail, so we just had to relabel our lines, and add a new hole in the trammel for our outside edge of the roadbed. You may not be so lucky, so remember the old adage “measure thrice; cut once.”
Once you are sure of the lines you’ve drawn, you can cut along the inner and outer roadbed lines with a sharp utility knife. Start with a new blade, and change it as soon as it feels like it’s “dragging,” or it will begin to tear the surface of the foam. When you remove the foam for cutting, use the trammel to mark the table surface at the distance of the inside or outside edge of the roadbed so you know where to put the foam roadbed back after you’ve cut it.
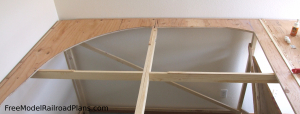
The rest of the benchwork is just framing, so you need to add the 5/8” sub-roadbed before you can add the foam roadbed. While you could just add a solid sheet of plywood like the surface of the end table, we opted to leave much of the framework open, mainly so we could access the back edges during construction without climbing on top of the table. You will need an access hatch to reach these spots anyway once the layout is finished, so the more possible locations you leave yourself, the better. Plus, the open framework gives you more options when creating the scenery later. Figure 23 shows how we cut the plywood for the back corner and along the right wall. We ran a narrow piece of plywood along the front edge of the front 3′ x 6′ table to add strength, and completely filled in the small table extension at the very right edge of the photo. Make sure you cut the plywood sub-roadbed where the tables join, or you will make it impossible to disassemble the tables later, if (or, more likely, when) needed. The plywood is glued and screwed to the 1”x3” piece of the table framing.
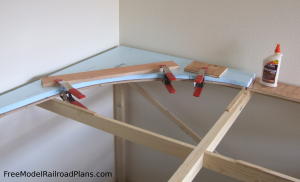
Figure 24 shows the piece of foam we cut to match the plywood corner. The foam, too, needs to have joints where the tables join. We didn’t worry about cutting the outer edge of the curve in the roadbed because this part of the track will be hidden later when we create our scenery. The foam is glued to the plywood with carpenter’s wood glue which gives a pretty strong joint. The foam is clamped down using scraps of wood to keep the clamps from damaging its soft surface.
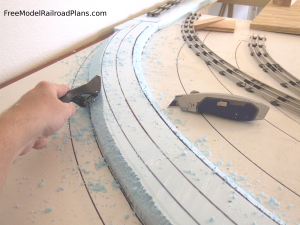
When the glue is dry, you can begin shaping the edge of the roadbed to the angle you will see when you look at prototype railroad. We used our sharp utility knife to take off the corners and begin the bevel angle, and then used a Stanley Surform rasp to continue the beveled shape, as shown in Figure 25. Keep your vacuum handy at this point, and suck up the foam particles frequently, or you will end up tracking them throughout the house. The particles pick up a static charge and will stick to you, your clothes, and especially your dog. Our German shepherd had blue highlights in her fur throughout this entire part of the project.
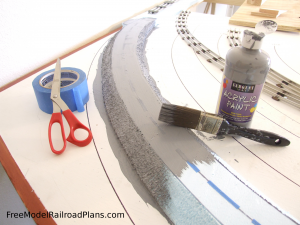
Once you are satisfied with the bevel, mark the center line on the roadbed so you can accurately lay the track later, and paint the roadbed with acrylic paint. We marked the center line with narrow bits of masking tape, as shown in Figure 26, that could be peeled away later to reveal the bright blue foam. Later, we realized we could just draw over the center-line with a dull carpenter’s pencil, and the indentation in the foam was visible enough to keep our track centered during track laying, and abandoned the more labor-intensive tape strips.
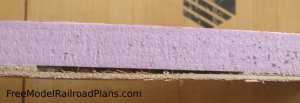
Looking at prototype railroad track near where you live, you will probably notice that the most heavily used mainline trackage has a more substantial roadbed than less-used sidings and secondary trackage. To mimic this effect, we used 3/4” foam sheet for the roadbed on our inner loops of track so that where they run side by side, the inner loops will be slightly lower in elevation. Since our inner loops of track will be elevated to varying heights from the 5/8” plywood sub-roadbed, we added a thin 5mm layer of plywood to the bottom of the 3/4” foam, as shown in Figure 27. The small void shown in this photo is not a problem, unless it goes all the way from one side to the other. In this case, squirt a little wood glue in it.
We originally tried using wood glue to laminate the 5mm plywood to the 3/4” foam, but while this provided a good joint on the sturdy benchwork, the torsion created when we tried to pick up the 4×8 sheets of wood and foam caused the joint to fail. We ended up using Gorilla Glue, which is a water-activated foam glue that can grip the smooth surface of the foam sheet. We laid the foam sheet in the driveway, applied of beads of Gorilla Glue on it, and spread them out with a hard rubber roller. We then used a spray bottle of water to wet the glue, and placed the 5mm plywood onto it. We placed a 5/8” sheet of plywood on top of that, and piled everything we could find on top of that to keep the thin plywood in contact with the foam sheet when the glue began to swell into foam. Check out our Tips and Tricks page Creating Strong Roadbed for Elevated Model Railroad Track for an illustrated tutorial. As noted in Figure 27 above, we were not entirely successful, but the small voids we found when we cut the foam later were not significant enough to weaken our roadbed.
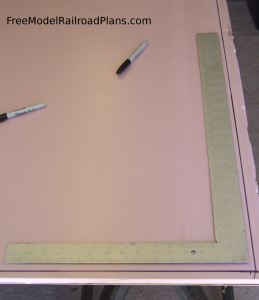
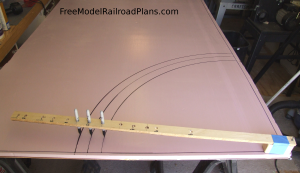
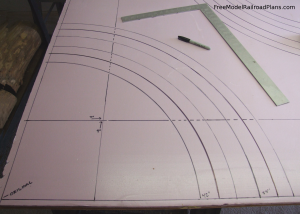
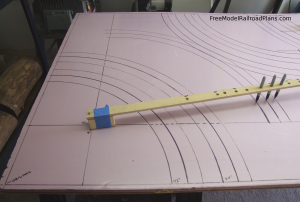
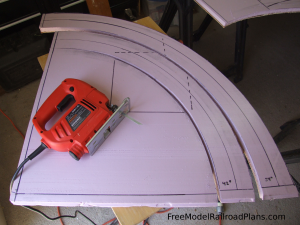
Once the glue was dry, we placed the surprisingly rigid wood/foam sandwich on sawhorses, and marked a square corner, as shown in Figure 28, from which to base all further measurements. From this corner, as shown in Figure 29, we used our trammel to mark quarter-circles of our 42” and 54” diameter curves we will be using for our inner loops. We experimented with a couple methods to lay out as many of these quarter-circles as would fit while creating as little waste as possible. The best method we found, shown in Figure 30, was to move up and over 9” from our original pivot creating a new square corner to draw a second set of quarter-circles. This allowed us to create a second set of quarter-circles as shown in Figure 31. Starting from the opposite corner, we repeated the process, and created two complete 42” and 54” circles of roadbed, as well as all the straight sections we needed and a few wider pieces to use under our switches.
We used a jigsaw with a fine-toothed blade to cut the roadbed curves from the 4×8 sheet, as shown in Figure 32. Don’t cut the straight ends at this time. After the curves have been freed from the 4×8 sheet, the ends of each curve must be carefully cut square with a miter saw so when you assemble them later the curves are true. Straight pieces of roadbed can be cut from the scrap left over from the 4×8 sheet using a table saw with the rip fence set to the roadbed width.
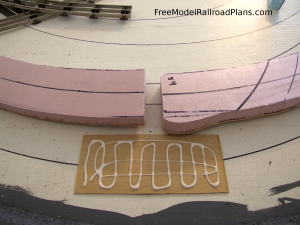
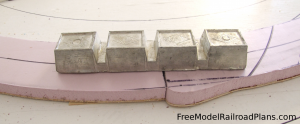
To join the separate sections of roadbed into a continuous path for the track, we used scraps of some 1/16” plywood we had laying about the shop, as shown in Figure 33. You could also use any leftover pieces of the 5mm plywood that we used earlier. Since you are bonding wood to wood, carpenter’s glue works fine for these joints. Once you are sure the joint is lined up correctly, weight it down until the glue dries, as shown in Figure 34. We glued most of this roadbed laying flat, and then elevated it later.
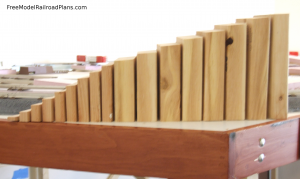
Since our inner loop is an over/under figure 8 design, we need to lift the roadbed of our inner loop above the 5/8” sub-roadbed. To do this we needed a series of risers (shown in Figure 35) that will, step by step, raise the track high enough to pass over itself. When climbing a grade, our model railroad, just like a prototype railroad, needs an even, gradual “grade.” We created a separate article on how to decide how much the track needs to rise and how to calculate the height and position of these risers on our Calculating Model Railroad Grades page.
The stiffness of our foam/plywood sandwich roadbed allows us to use these risers every 10” without it sagging under the weight of a train. Since railroad grades are measured in percent, 10″ spacing of the risers makes it easier to calculate their height.
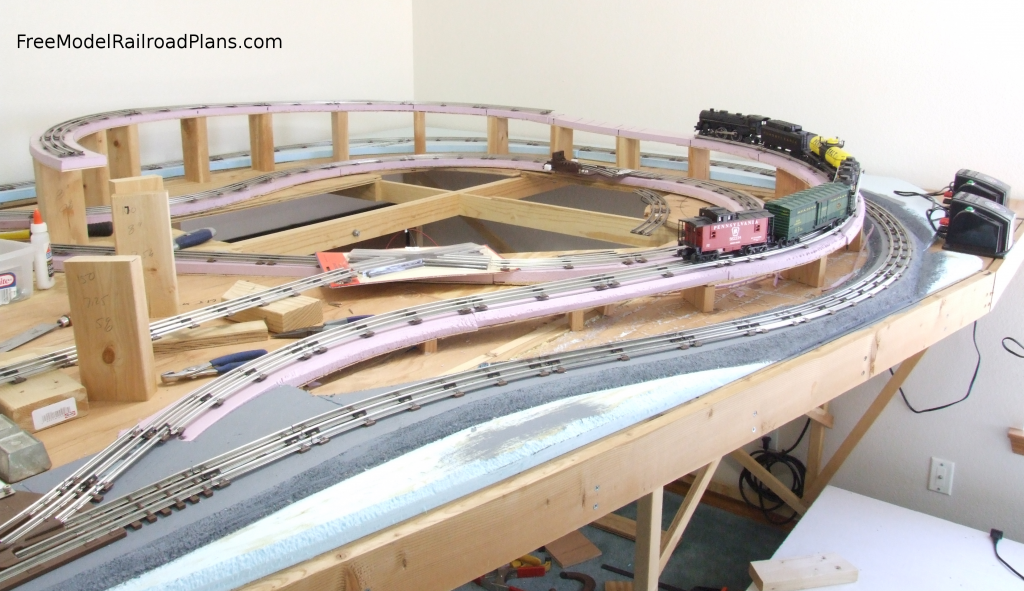
Figure 36 shows our progress on our O Gauge Spare Bedroom Model Railroad Layout Project with the outer loop of track already laid. We have already placed the first half of our risers, and laid our inner loop roadbed from where it begins at the outer loop switch up to the figure 8 overpass. Many of these risers will be hidden later by scenery, or in some cases, removed and replaced by bridge abutments, piers, or trestles.
We’ve also glued together much of the lower part of the inner loop roadbed that passes under the overpass. We’ve temporarily laid some track on the roadbed to try and determine the exact location we need to install the 45-degree crossing piece where the siding coming off the lower inner loop switch at the right of the photo. No matter how carefully you plan, some things just require testing and fitting!
Go to:
Page 1: Deciding on the Location for a Model Railroad Layout
Page 2: Deciding How Much Space to Give Your Model Railroad Layout
Page 3: Building Benchwork for Your Model Railroad Layout
Page 4: Designing trackwork for your model railroad layout
Please Support FreeModelRailroadPlans.com
FreeModelRailroadPlans.com is entirely user supported. If you find something of value here, please “pay it forward” and help us keep the site operating by a secure donation through PayPal (PayPal account is not required), or by shopping with our advertisers.
Thank you for your support!
