Types of Model Railroad Layouts
A loop of train track is just a beginning
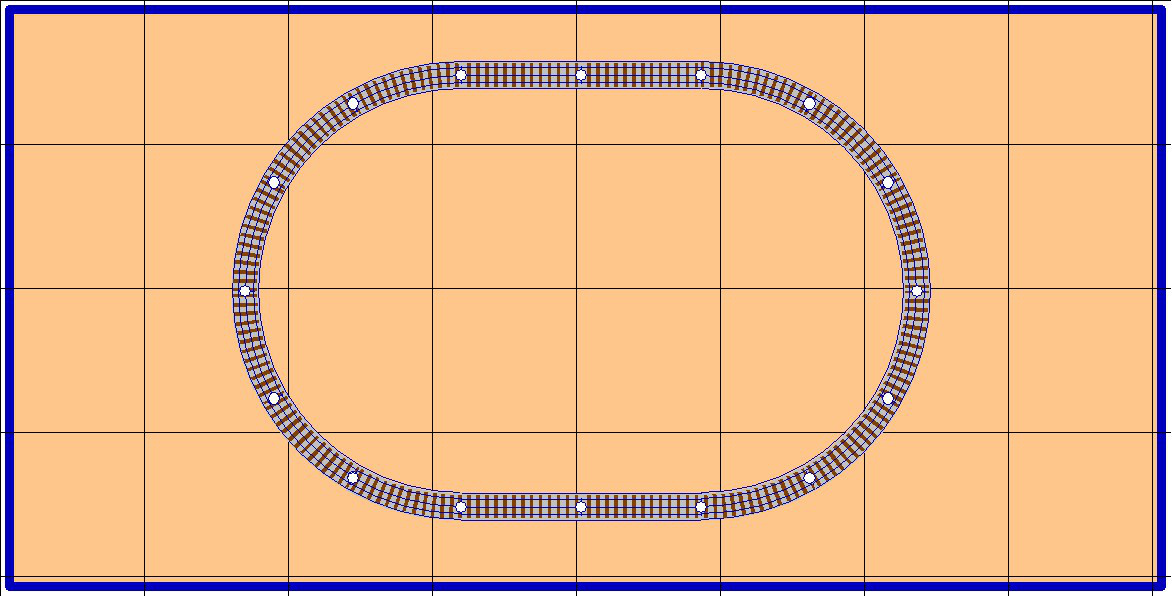
Most model railroad sets come with a simple loop of track, such as figure 1, which allows your train to run continuously, without your constant attention. This is great for a display layout, such as under the Christmas tree, where you want it to simply add to the holiday atmosphere (add some scented smoke fluid to your O gauge steam locomotive, and it will LITERALLY add to the holiday atmosphere!).
However, if you want to expand your model railroad layout from a holiday decoration to a hobby, you may want to make some changes to the track to make it more interactive. To do this, it’s time to think about model railroad track planning. When it comes to model railroad layout track plans, nearly all can be classified as one of three main types: Continuous-run, point-to-point, and out-and-back. Complex track plans may contain elements of all three, but the overall theme can usually still be brought back to one of the original three. So, let’s examine each type, and its pros and cons.
Continuous-run Model Train Layouts
As I pointed out above, the loop of track that came with your train set is a continuous-run model railroad layout. The biggest advantage of this layout design is (duh…) that the train can run continuously without your interaction. If you’re like me, you like to tinker with the layout while the trains are running. On this type of layout, if you turn your attention to improving a small detail of scenery, the train continues to operate in the background.
Probably the biggest disadvantage of a continuous-run model railroad track plan is that, on a 4′ x 8′ layout, without careful planning of scenic elements, it’s pretty obvious the train is just chasing its tail around a loop of track. Prototype trains don’t operate that way, and a model railroad that does can get pretty boring.
There are some easy modifications to the simple loop track design that can make it more realistic, even on a layout limited to a single sheet of plywood. Check out our Simple 4×8 Layouts page, as well as our Modifications to Simple Loop Track Designs page to see some of these.
Point-to-point Model Train Layouts
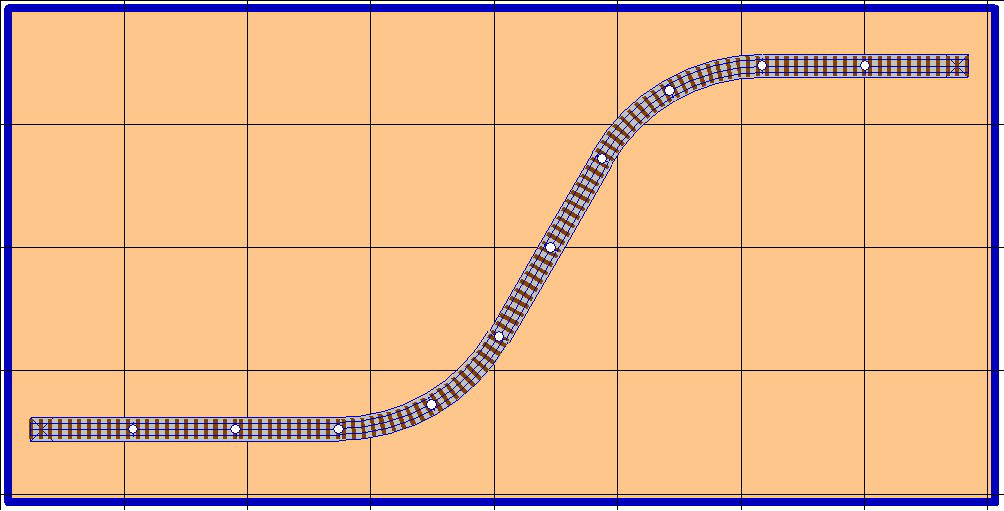
Prototype railroads are all point-to-point. They load passengers and goods aboard at point “A” and deliver them to points “B,” “C,” “D,” etc. So, from an operational aspect, this model railroad layout design is the most like a prototype railroad. The simplest form of this would just be a single track running from one end of the layout to the other. But, even in a layout that fills a room, the mainline run would be disappointingly short. Imagine, as in figure 2, how short a single track mainline would be on a 4′ x 8′ sheet of plywood layout.
But, prototype railroads don’t often run in a straight line. They have to negotiate natural or man-made obstacles. Because of a railroad’s limitations on the grade – or angle of ascent – on which it can operate, sometimes prototype tracks double back on themselves in order to lengthen their run, and thus, the height to which they can climb. Imagine in figure 3, there is a steep hill bisecting the layout that the train traverses using the double-back curves.
While these basic plans would seem to limit operational options, point-to-point layouts can offer a lot of different ways to operate your model railroad. See more options to add interest to this style of layout on our Point-to-point Model Railroad Layouts page.
Out-and-back Model Train Layouts
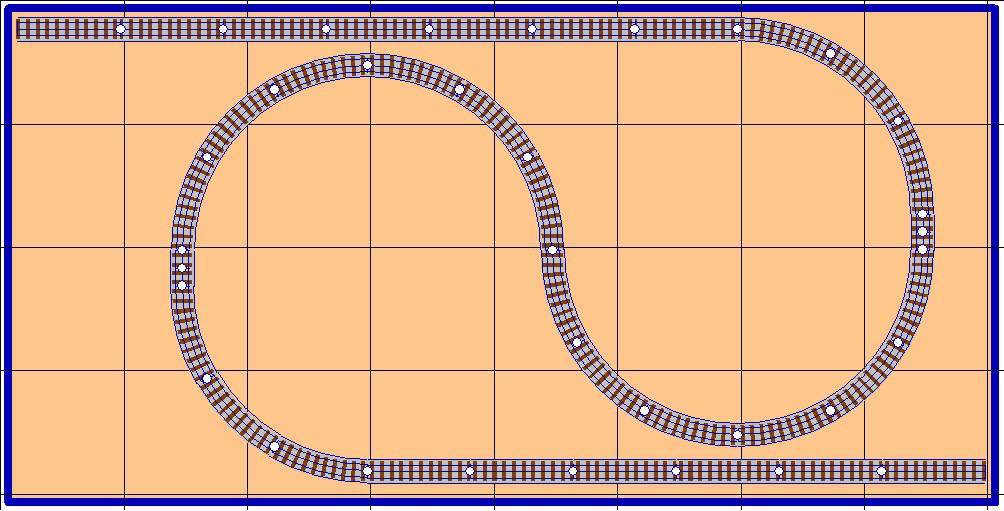
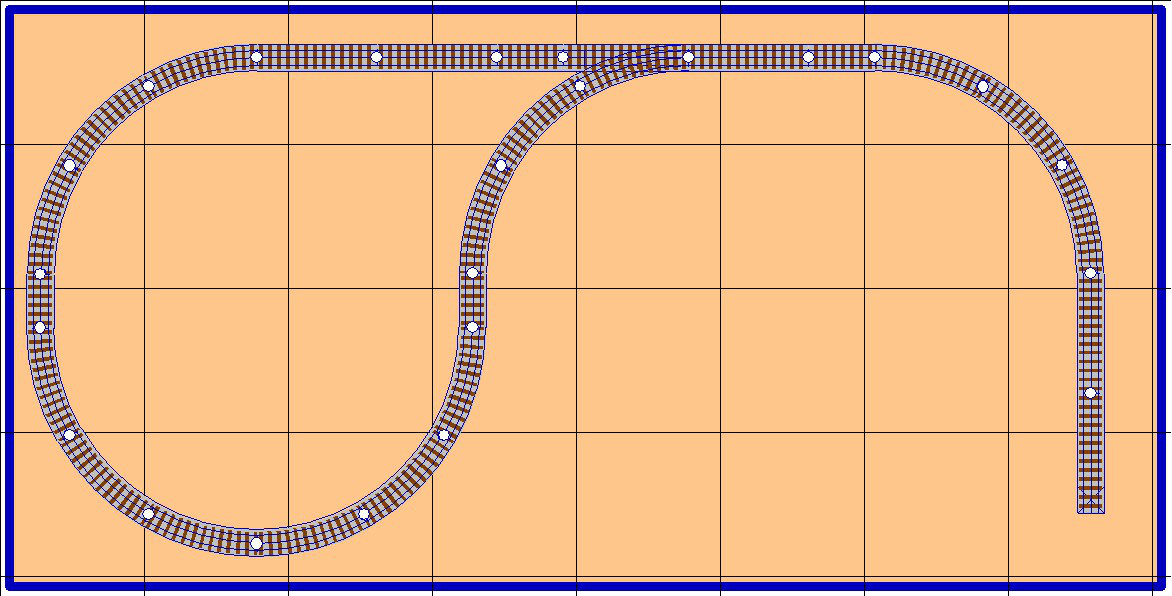
An out-and-back model train layout track design is basically a point-to-point design that doubles back on itself, so it only has one terminus, as in figure 4. The train goes “out” of the terminal, only to return to it after circling the far end of the layout. This, in effect, doubles the length of the point-to-point mainline run, but requires the single terminal to stand in for two different terminals that would, in the real world, be many miles apart.
The main advantage to this style of model railroad layout is that the loop at the far end of the track serves to reverse the direction the locomotive faces, an operation that would otherwise require employing the “Five-finger Sky Crane” to achieve.
For other variations on the out-and-back model train layout design, see our Out-and-back Layout Designs page.
As I said earlier, model railroad designs get more complex, they often begin to encompass more than one of these basic plans, but many can still fit on an 4′ x 8′ sheet of plywood. For continuous-run plans that also contain point-to-point and out-and-back elements, see our Simple 4×8 Layouts page.
I’ve got a simple layout double back running around two Christmas trees, but would like for the train to change directions. Is that possible without adding a Wye?
The easiest way to change direction is a reverse loop. Create a loop of track that connects the straight and curved ends of a switch so a train traveling through the straight end of the switch returns via the curved end. This is illustrated in figure 4, the simple out-and-back layout pictured above.
Here’s an idea. Create a loop layout, but configure the sidings so it can serve as a point to point. Have one inner siding and one outer siding, set up so the train can start at one end, run continuously until it reaches the other end. Or else if you want, set the switches so it runs in loop mode.
Thanks for visiting the website, and for your comment. On our page “Layouts beyond the loop: more layout ideas for a 4′ x 8′ table” check out the layouts Figure 7: Inside and Outside Sidings, Figure 8: 2 Inside and 1 Outside Siding, and Figure 11: Two Loops Connected. These layouts have a the features you are looking for.